Thank you so much for your kind words about my LIVING ROOM MAKEOVER! We are really enjoying the room and love how functional it is now…those cabinets allow me to “hide” our DVDs, board games, and puzzles AND it is so fun to display special items on the shelves.
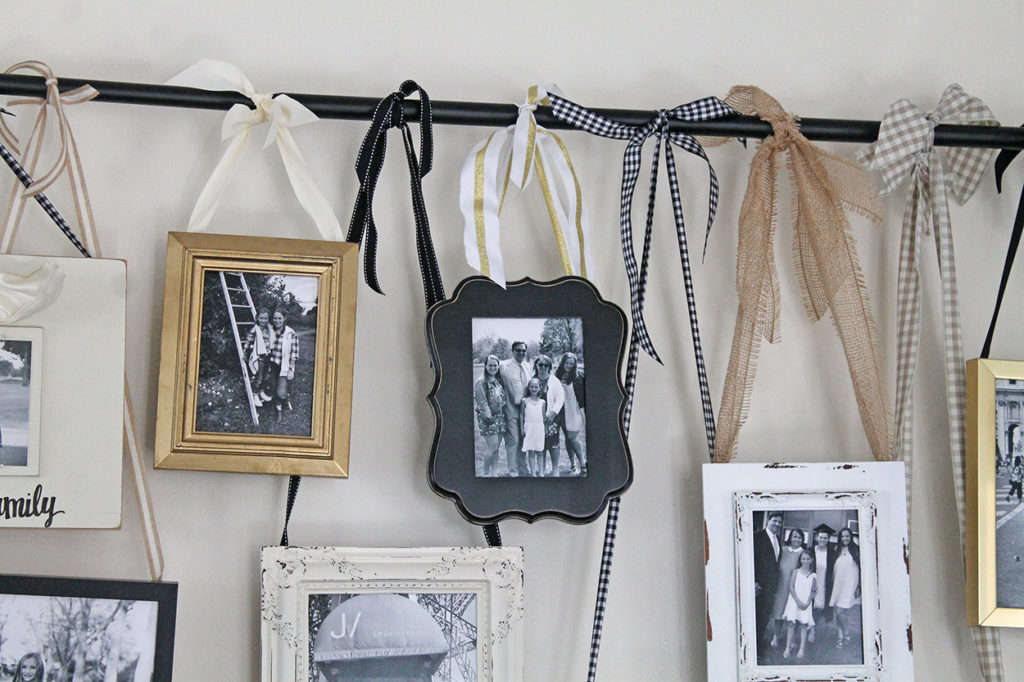
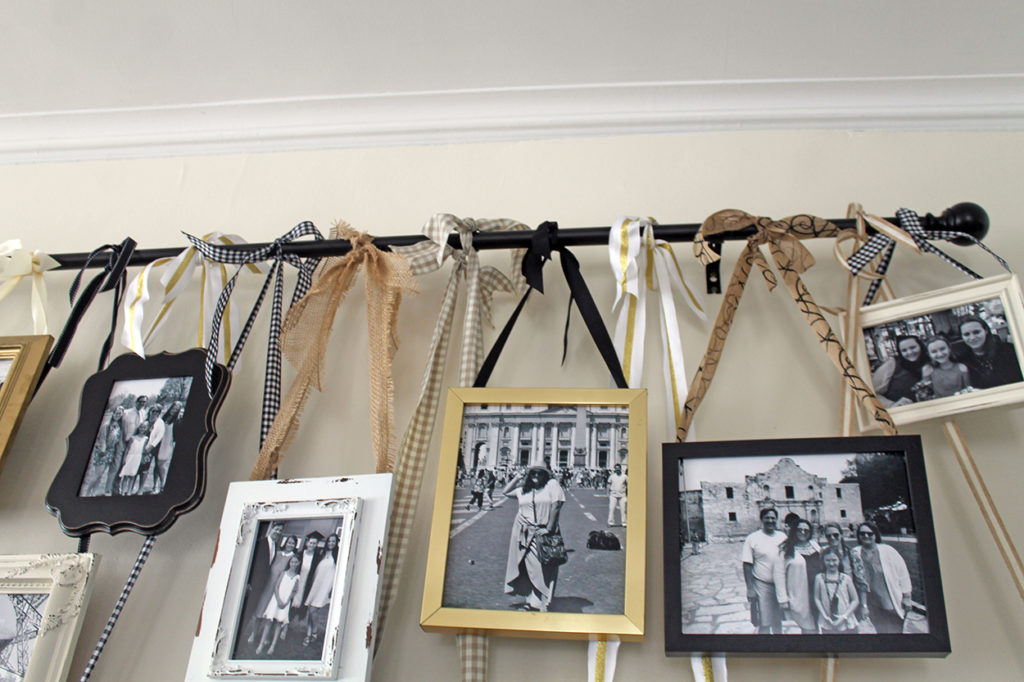
There were some questions about “that hanging structure of pictures” on the wall above my sofa. I know…it looks a bit crazy having a curtain rod with pictures hanging off of it in the middle of the wall. The inspiration for this actually came while on a visit to our local IKEA store. They had a similar display in one of their showrooms, and I loved it immediately! Our original plan for this wall was to do a traditional gallery wall of nine framed pictures (3 rows of 3). I loved the eclectic look of this, though…so I decided to do this instead.
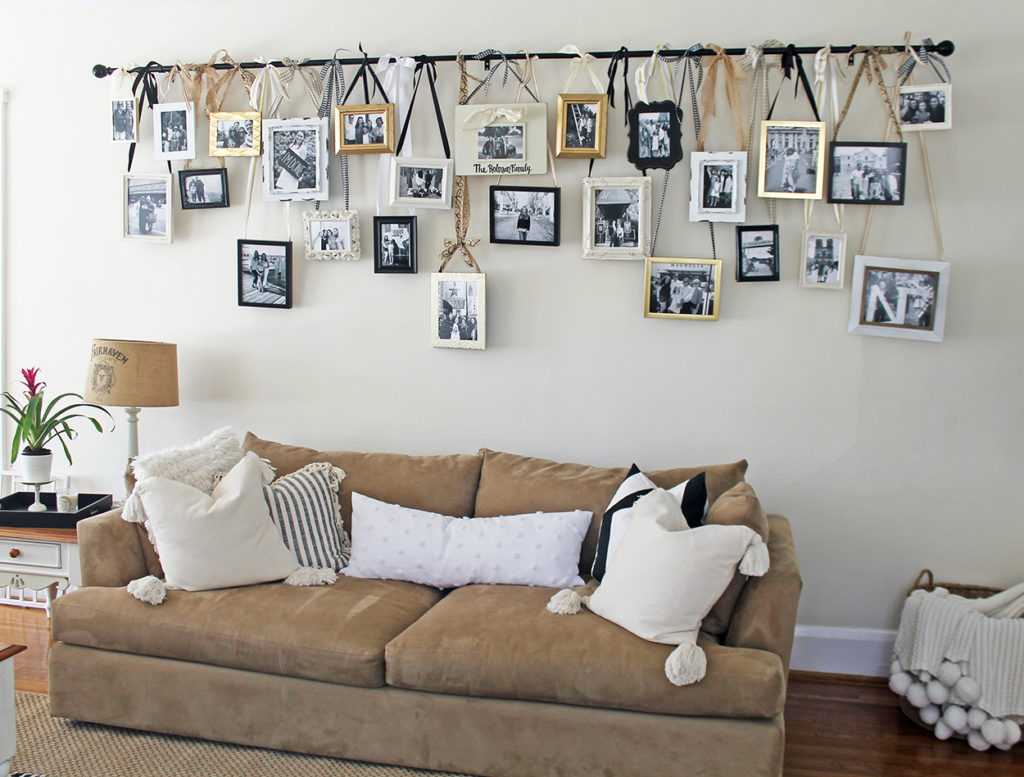
It looks simple enough…just hang some pictures with ribbon from a curtain rod, right? That’s what I thought, too! I did learn some tips and tricks as I dove into this project that I wanted to share.
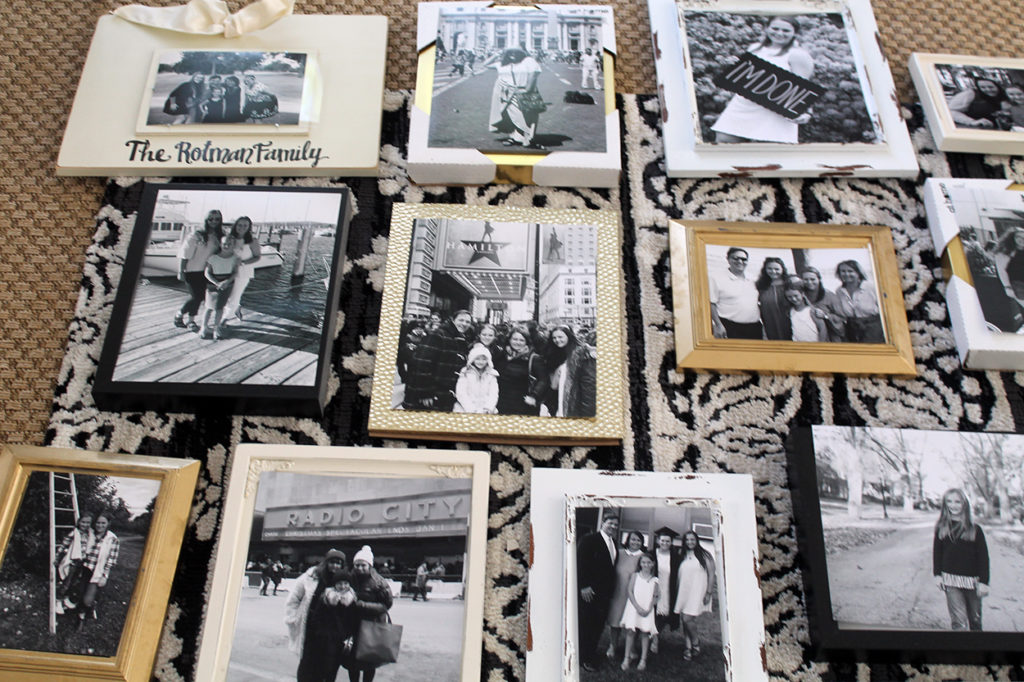
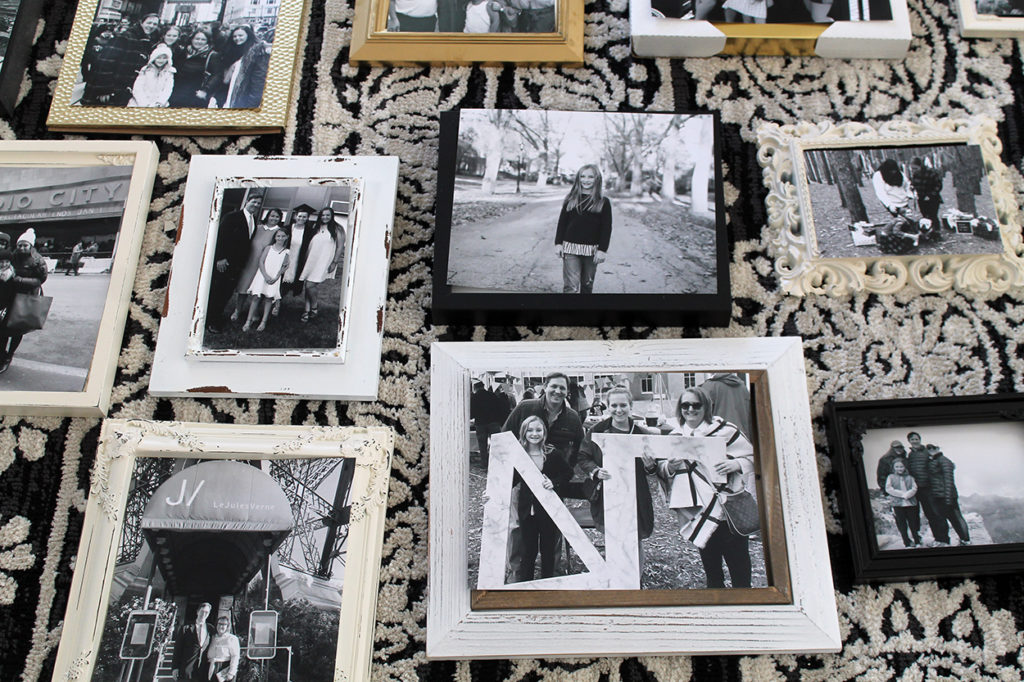
I started by laying out my framed pictures on the floor. Not in any certain order, but just so that I could see what I had on hand. I used black and white photos for this gallery wall…I just think it has a nice look. No competing colors, and it keeps the focus on the subjects of the pictures. I used two different sizes…8×10 and 5×7. In keeping with my color scheme of the room, I used white, cream, gold, and black frames. I had most of these on hand…I did spray paint a few to better coordinate, though. One final tip about the frames…I removed all the glass tops. I was worried about the weight of so many pictures hanging from that rod. Also, we have so much natural light in the room…so it eliminates any glare or reflection that there may be on the glass.
The next step was to hang the curtain rod. I used THIS ONE…and what a great price it was for that size.
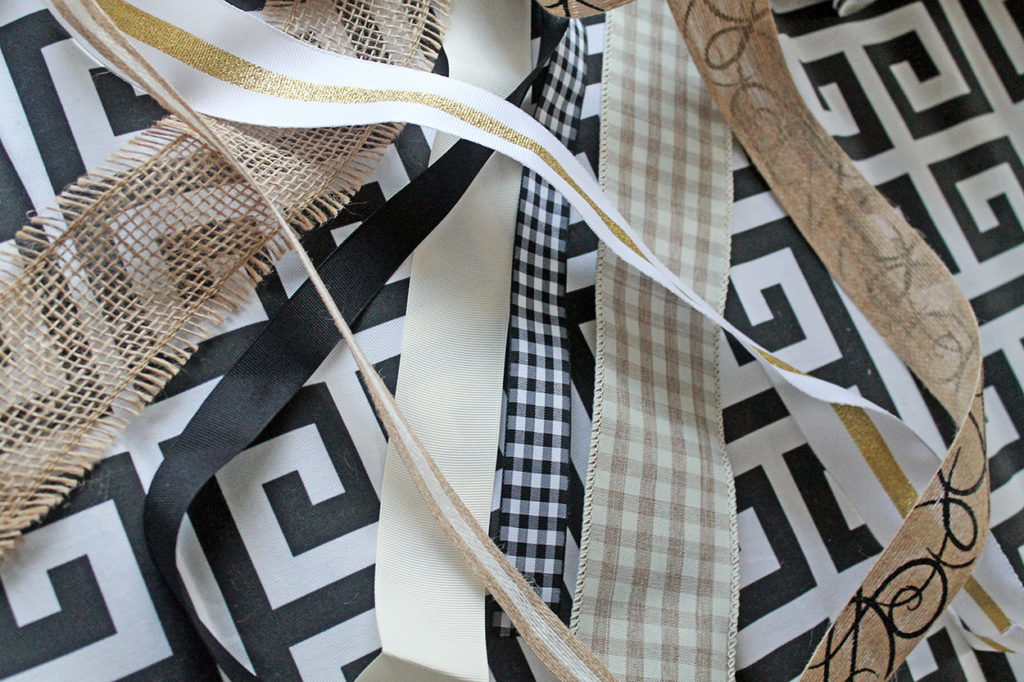
Besides the framed pictures and curtain rod, I also used a variety of ribbon for this project. I chose neutral colors to coordinate with the frames.
To hang the pictures, I used a staple gun to place staples in the top corners on the back side of the frame. Then I strung the ribbon through the opening of each staple.
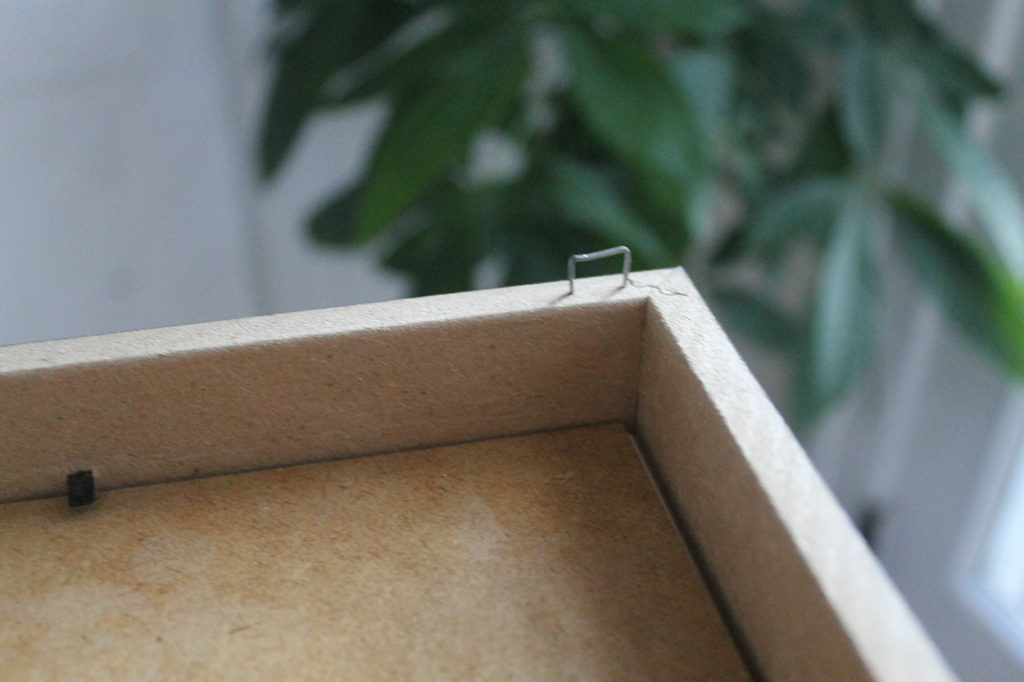

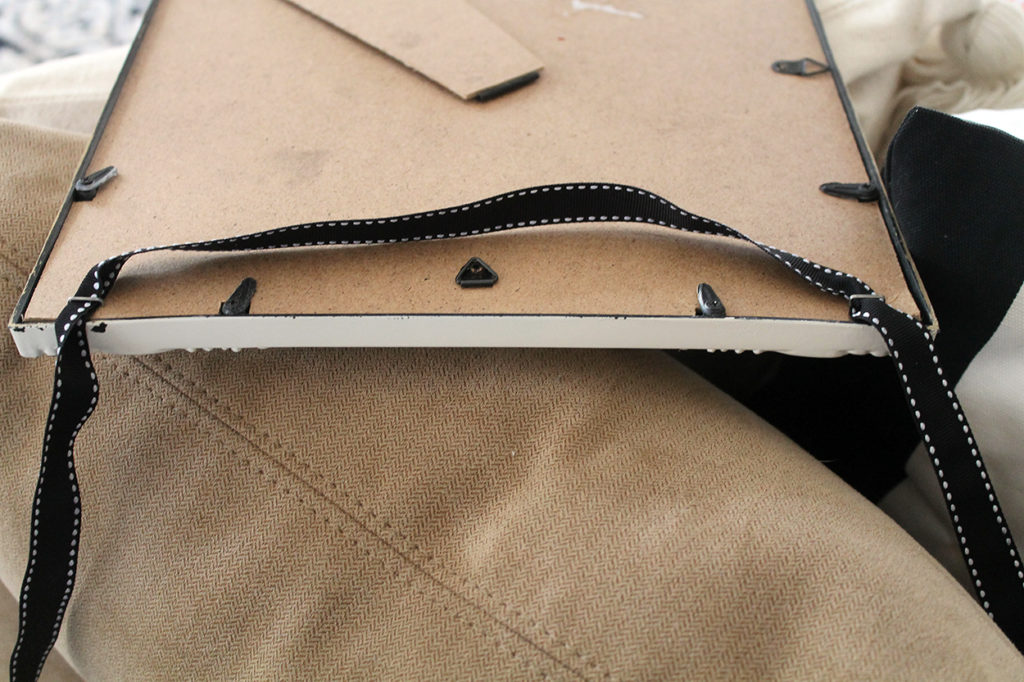
One other tip about the backs of the frames is to use a glue dot to make sure any easel backs stay in place.

So once you have the ribbon strung through the staples, make a loop by tying the ribbon ends together loosely AND then tie it again, this time around the top of the curtain rod.

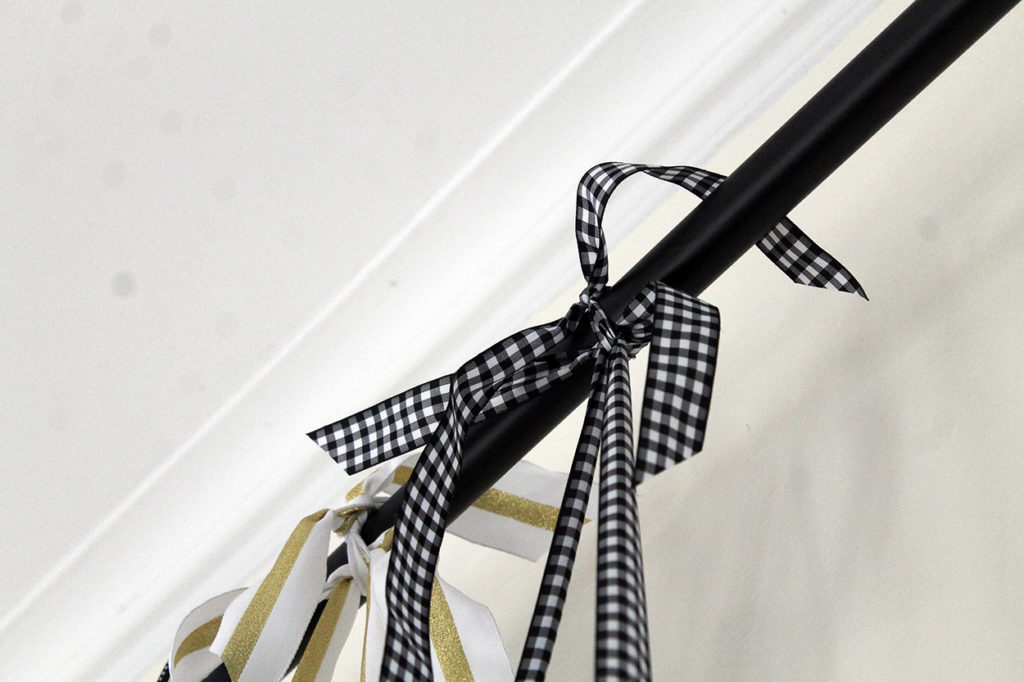
I just trimmed the ends of the ribbon and let them hang. Gives it a fun, slightly unfinished look!
Just a few more tips…
I started hanging my pictures from the middle of the rod and worked my way to the end of one side of the rod until it was filled, and then I did the same on the other side of the curtain rod.
I varied the lengths of each ribbon so that the pictures are hung at various heights.
I tried to intersperse the sizes of the frames so that there was a mixture of sizes hanging at different levels.
And finally…if I didn’t like how something looked, I untied it and started again.

I’m so happy with how it turned out! I love how eclectic it looks and I was able to hang so many more pictures than if I had gone with my original plan…so many special memories hanging on that wall!

Leave a Reply